Smart Bin Counter
Start Date: April 2015
This project is part of an entry for the Fun Bin challenge. The challenge aims to:
Exercise your imagination and create a bin that actively helps in promoting a clean and green city! Come up with exciting and innovative ideas that could make the binning experience a more memorable one for everyone.
To vote for our bin please see the video and other great ideas, from other teams in Singapore.
Design
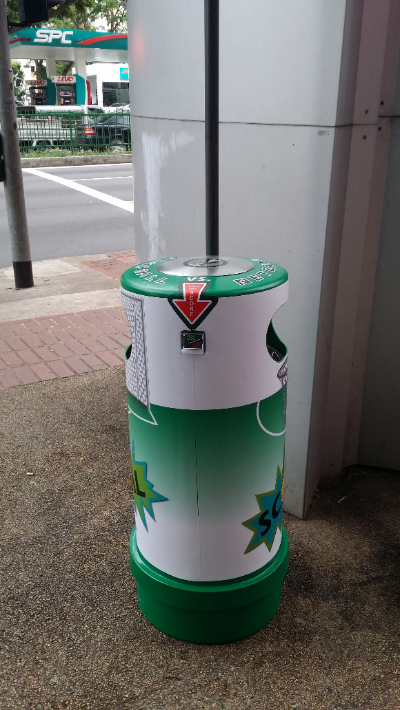
The bin is designed using the standard 'Green Bin' found all around Singapore. The design lends itself to allow for all types of voting with your rubbish, such as Arduino / iOS or in our case Footbal / Netball. So which side of the bin you use to throw away your rubbish you can make a vote. The idea was to build in a scoring mechanism that could show which side of the bin was winning or losing.
The Build
The bin contains an Arduino-based device that uses two ultrasonic distance senors to detect which side of the bin the rubbish item was thrown into. The device shows the current score via an LCD display.
Features
- Detect and records which side of the bin the rubbish enters.
- Show 'score' for different sides of the bin on the LCD display. (green for the leading score; red for the trailing score).
- Record score every day in EEPROM for up to one month.
- Show date and time if the bin is turned over or is not standing.
- Show date and time overnight to conserve power.
- Power the Arduino and sensors from a solar panel and a Lipo battery.
- Show a pause message if the bin is on its side or turned upside down.
- Reset the counter upon system restart.
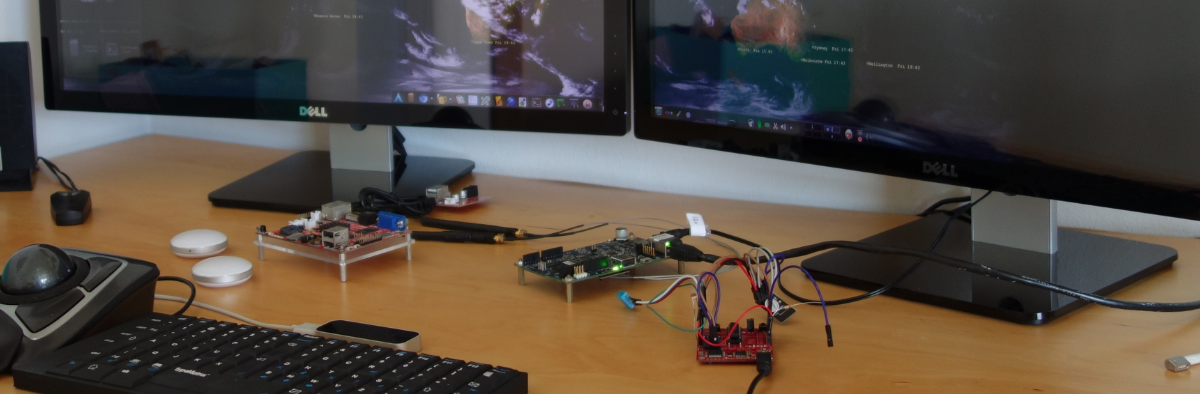
Hardware
- Iteaduino UNO - Arduino UNO
- ITDB02-1.8SP - LCD Display 128 x 160
- 2 x Ultrasonic Ranging Module HC-SR04
- Real Time Clock Module (DS1307) V1.1 5.
- Tilt ball switch
- Polymer Lithium Ion Battery (Lipo) (3.2v 2200 mAh)
- 3W Solar Cell
- Li-Po Rider v1.3
Source code
Build Images

The 'Standard' green bin seen around Singapore.

The football and netball graphics before they are placed arround the bin.

Running tests on the code to show the two scores. Currently the left side is winning with 6 to 5.

Test screen showing the arduino in 'night mode' to try and conserve battery power.

The power part of the build, this includes the Lipo battery charger and Lipo battery.

The build before glueing the 'Tupperwre' to the underside of the bin. The power and battery is kept in a seperate section within the tupperware. The 3W solar panel shown in the background.
Once we had all of the main hardware in the tupperware, we connected the external ultrasonic sensors and LCD display via two db9 connectors. This allowed us to disconect and remove the tuppwerware case so that we can easily repair/fix any issues.